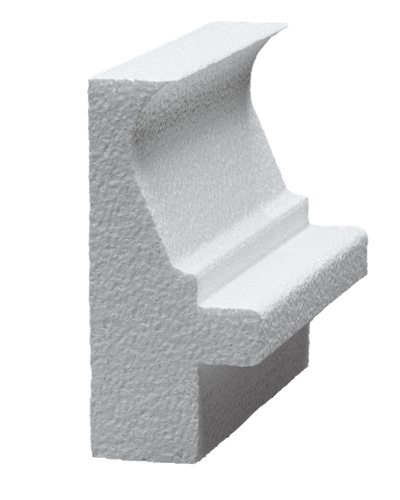
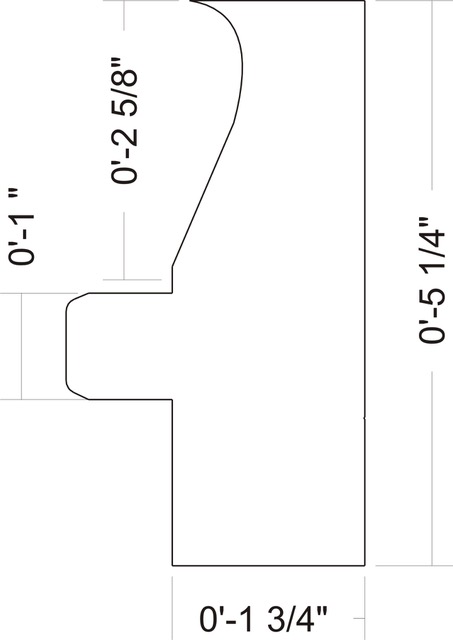
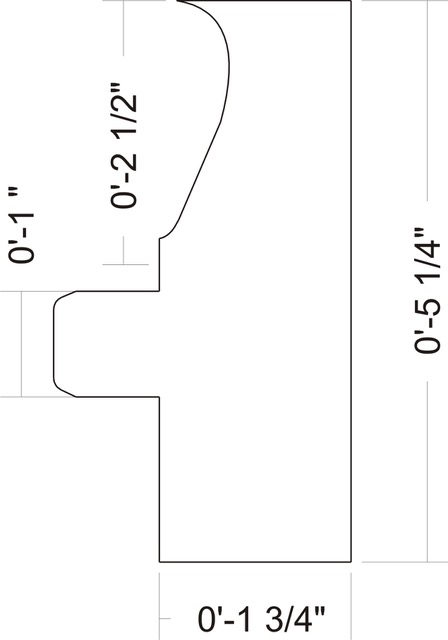
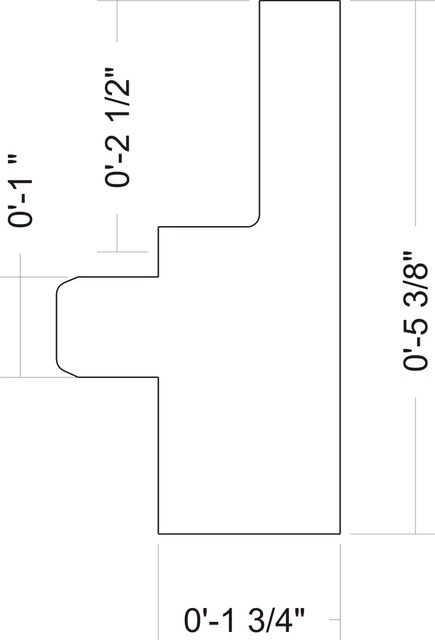
MM-NC-RC-CS-FL

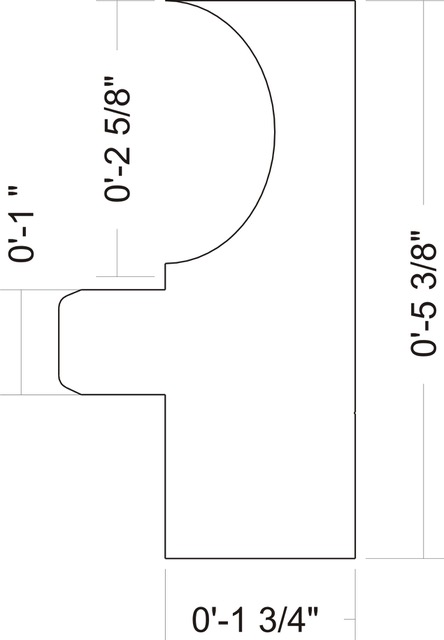
MM-NC-RC-FG-CS-FL

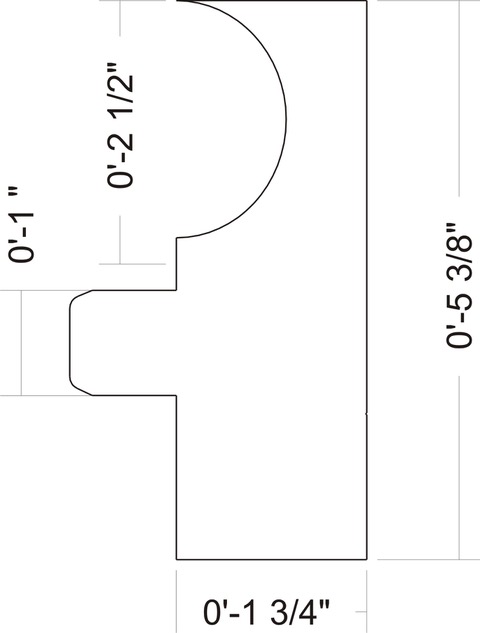
MM-BN-RC-CS-FL
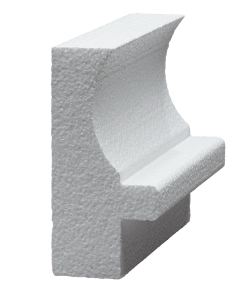
MM-BN-RC-FG-CS-FL
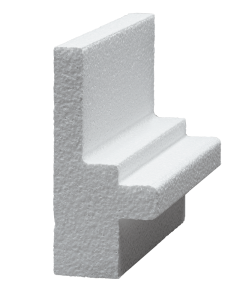
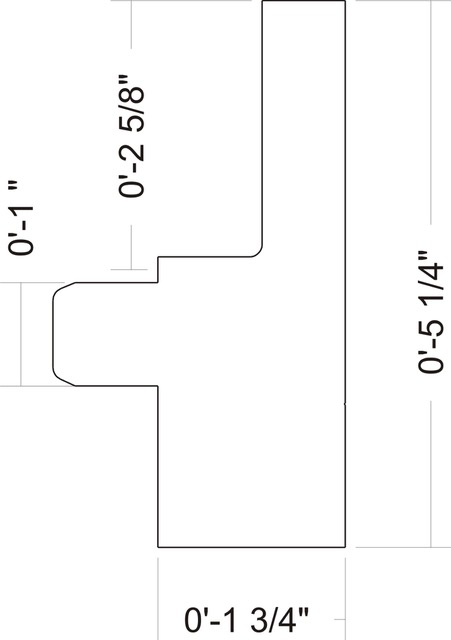
MM-SqP-RC-CS-FL

MM-SqP-RC-FG-CS-FL
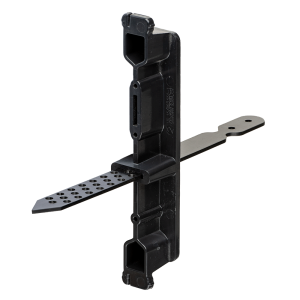
Liner Auto Cover Clip
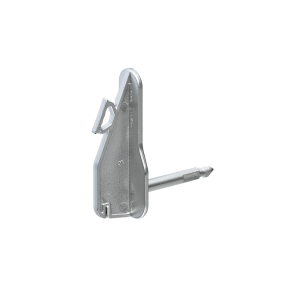
Universal Clip
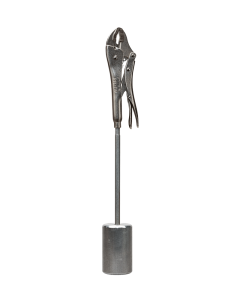
Slide Hammer
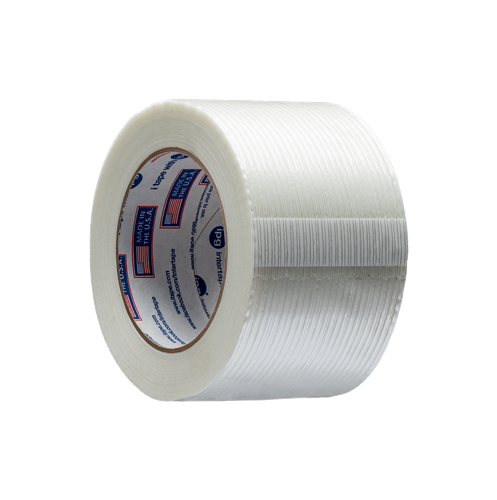
Filament Tape
Universal Clip

Liner Clip
Universal Clip

Assess the shape of the pool and determine where you will need to trim the coping and create 90° corners.

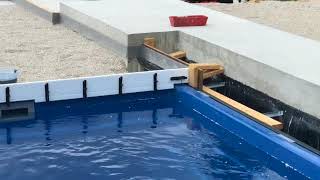
Insert the coping into the auto cover track and trim the coping to fit around the auto cover housing. Modern Moudling's pool coping is designed to wedge into the auto cover track, eliminating the need for two-way tape or tie-wire. This innovative design also ensures a secure fit and no debris to clean out of the track after the pour.
Fasten the coping to the pool using either the Liner clip, the Fiberglass clip or the Universal clip, depending on the type of pool installation. For best results, clips should be 10-12" apart around the curves and 8-10" apart where the pool is straight.
a) Liner clip - Insert the reuasable clips along the line and push them into the liner track. Rotate the clip 90° to lock it in. When you get to a joint, insert a clip and rotate it 45° to cover both forms and ensure maximum support.
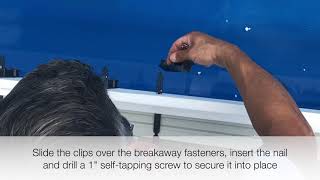
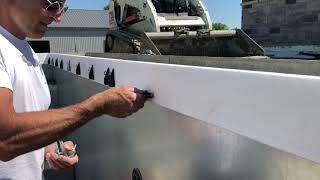
b) Universal clip - Insert the fastener through the coping form. Slide the reusable clip over the fastener and secure it in place with a nail in the hole provided. Drill a 1" self-tapping screw to secure it to the edge of the pool.
Ready to pour! Remember to spray the forms with form release or cooking oil and remove all bending tape prior to pouring. Pour the concrete away from the coping and rake or shovel it into the coping form. Using a vibrating tool, vibrate around the coping for a smooth finish.
Stripping the forms
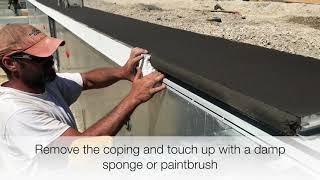
a) Liner clip - Before the concrete has fully cured, unlock the clips and remove the coping forms. Using a damp sponge, smooth out the joints and edges.

b) Universal clip - Remove the nail and the reusable clips. Pull off the coping forms. Using a damp sponge, smooth out the joints and edges.
Removing tabs for Universal Clips
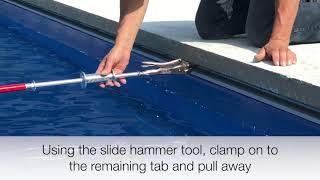
Using the slide hammer tool, clamp onto the remaining tab and pull away on a downward angle using force to remove the tab. Make sure to save some cement to fill the voids and touch up the profile.